fabric iPad sleeve tutorial


Harriet 005.

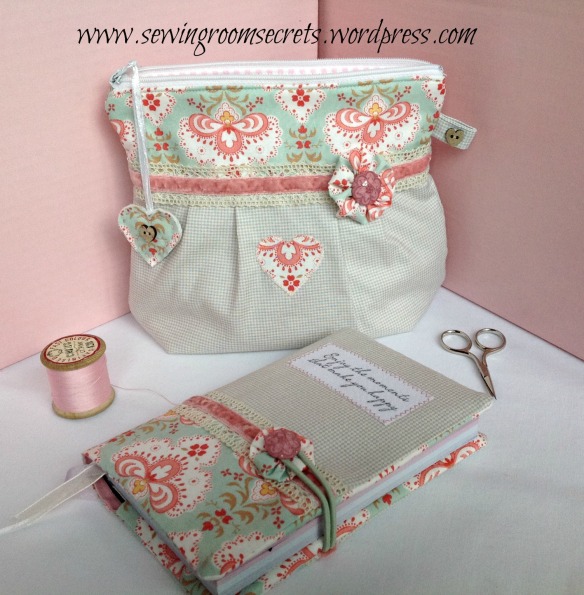
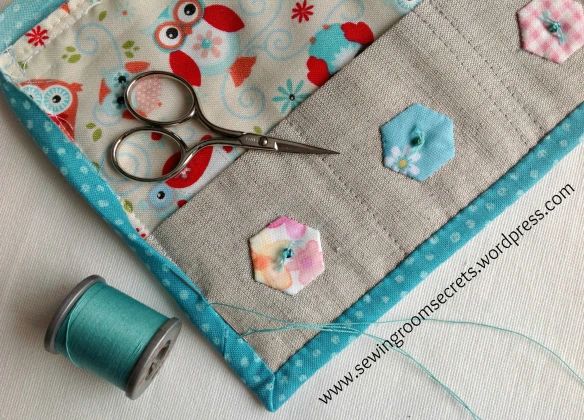
I had been wondering what I could make with a little embroidered piece that I stitched recently and finally decided on a new iPad cover.  I already have a ‘Smart Case’ for my iPad and, whilst I like the protection that the hard folding cover gives to the screen, the fact remains that it is a dull grey colour, a little grubby from fingerprints and well … just plain boring!

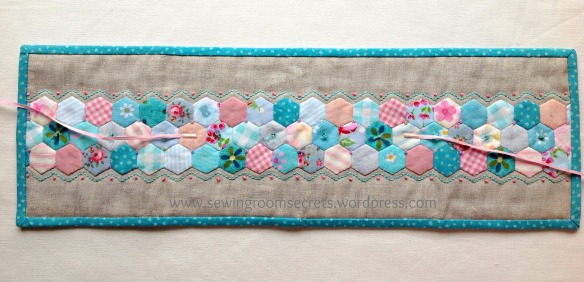
So, I wanted to pretty things up a wee bit and this is the result …

iPad cover1

iPad cover3

iPad cover2

iPad cover9

iPad cover7

iPad cover11

I made a slightly different version for my mother-in-law, adding her initial in embroidery on the front. I added a velcro flap at the top, rather than an elastic and button closure and I also quilted the background of the linen section.  I found some wonderful embroidery templates for monogram letters here.

iPad cover4

If you would like to have a go at making a fabric iPad sleeve, I’ve jotted down some quick instructions below on how I made mine.  You can do anything you like on the front cover – I used my new Harriet & her Teddy design on the front of mine (available in my pattern shop), or you can just keep it simple by using two pretty co-ordinating fabrics – just go with what you fancy!

Before we get started, I need to point out that I made mine big enough to accommodate an iPad4 and a Smart Case.  If you want to make a cover just for an iPad on it’s own, I would suggest using a 1/2″ seam allowance throughout (for a snugger fit), rather than a 1/4″ seam allowance.

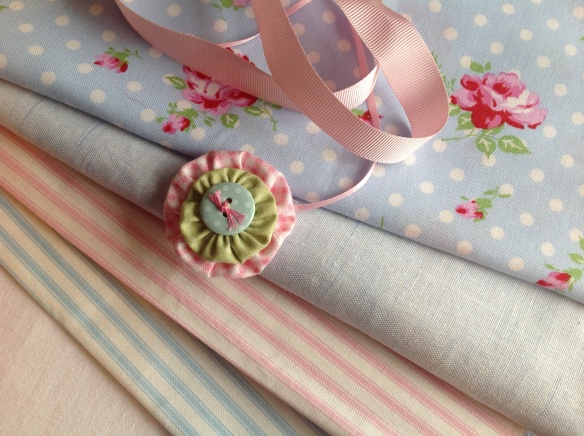
So, what you will need is:

For the outside

  • 2 pieces of fabric 9.5” x 8.75” – for the bottom of the outside cover
  • 2 pieces of co-ordinating fabric 9.5” x 3” – for the top of the outside cover
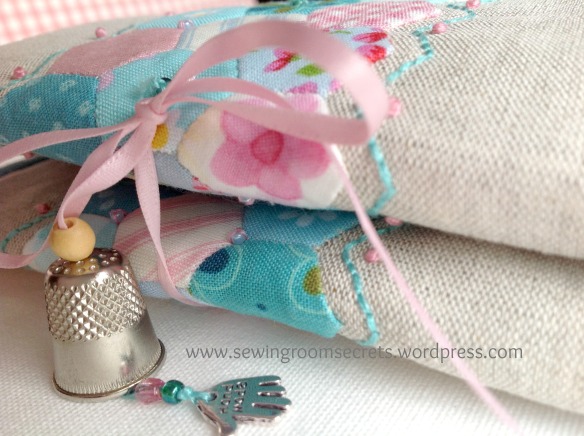
  • 2 lengths of ribbon around 10” long, plus extra for the bow
  • 1 small button (for the bow centre) and a larger button for the closure
  • 1 adult hair elastic/ponytail holder (or similar thin elastic)

For the inside

  • 2 pieces of thin wadding (batting) 9.5” x 11.25”
  • 2 pieces of lining fabric 9.5” x 11.5” (the extra 1/4″ in length for the lining fabric is for the trim at the top edge)

*Use 1/4″ seam throughout

1. Cut out all the pieces before you start

Harriet 3

To make the outside cover …

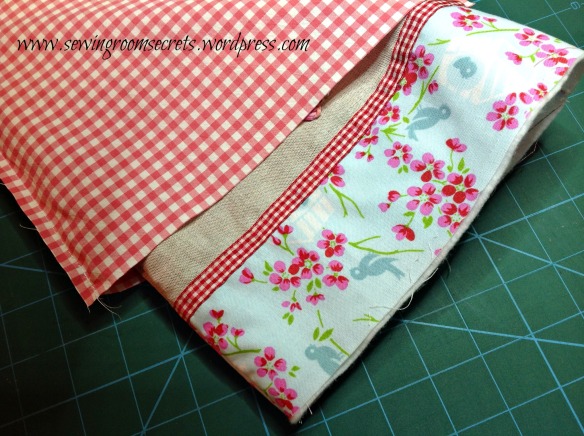
2. With right sides together, stitch each of the two top pieces (9.5” x 3”) to the bottom pieces (9.5” x 8.75”)

Harriet 1

3. Cover the seam lines by stitching on some co-ordinating ribbon

Harriet 2

4. Make a ‘quilt sandwich’ by laying one 9.5” x 11.25” piece of wadding down on your work table first, followed by the front cover (right side up), followed by the back cover (right side down), and finishing with another 9.5” x 11.25” piece of wadding. Line up all raw edges and pin.

5. Stitch all four layers together using ¼” seam, leaving the top open. Backstitch a few stitches at the start and end of sewing to stop the seam opening when you turn it right side out.

Stitch all the layers together

6. Trim away the wadding to about 1/8th of an inch from the sewn line to reduce bulk, clip the corners and turn right side out. Push out the corners to give nice neat points.

7. Sew the elastic hairband onto the outside of the back cover by placing it in the centre and stitching over it a few times about an 1/8th of an inch from the edge. Allow a little of the elastic to hang off the edge (you will trim it later).

Harriet 11

8. Now take your lining fabric and place the pieces right sides together. Stitch down both long sides and along the bottom, leaving a 4” opening at the bottom for turning. Leave the top open.  Clip the corners, but don’t turn it right side out yet!

Lining

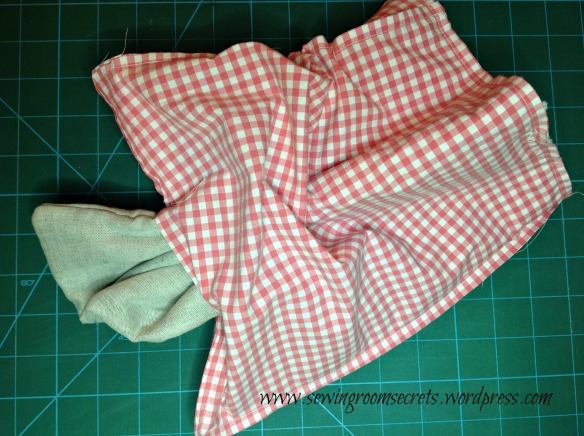
9. To join your outer cover and lining, keep your lining inside out & your outer piece right side out and slip the assembled cover inside the lining, matching up your two side seams. They should now be right sides together.

Harriet 10

10. Line up the top edges of the lining and the outside cover and stitch a ¼” seam all around the top edge. Trim away the excess elastic from the seam allowance.

Collage1

11. Gently pull the front cover through the gap that you left in the lining. *Tip:  I use a star headed screw driver to turn things out as I find that the little star head grips the fabric and helps things along 🙂

Harriet 512. Poke out the corners and press

Harriet 8

13. Stitch the opening closed

sew opening closed

14. Gently push the lining inside the cover.  You will find that a little of the lining will naturally fold around the wadding at the top edge to give a nice little trim along the top (that’s the reason why we cut the lining pieces that extra 1/4″ longer 😉 )

iPad cover12

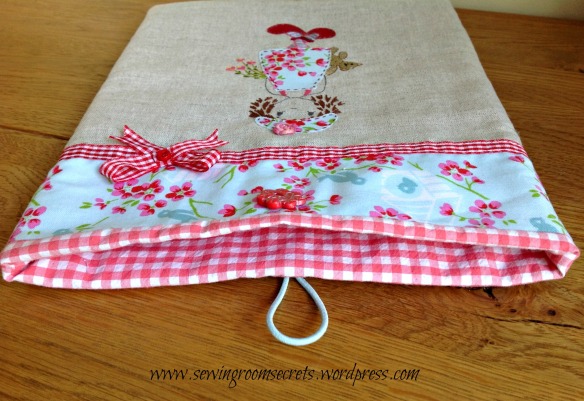
15. Sew on a pretty button and top-stitch ‘in the ditch’ where the lining and the outside meet to give a neat finish (although it looks just fine without this step).

Top stitch to finish (optional)

ipadcover5

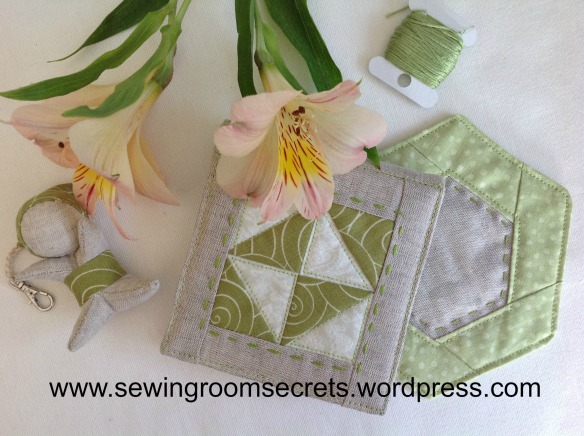
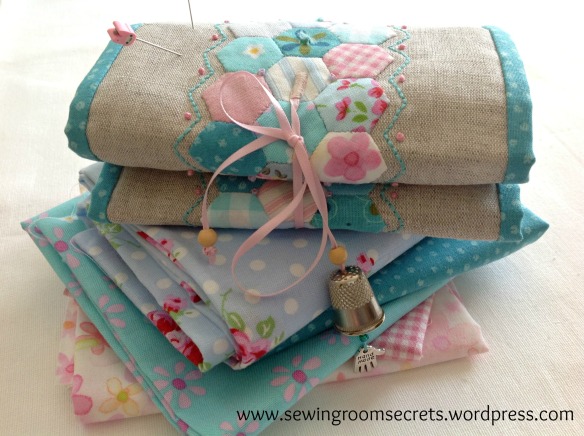
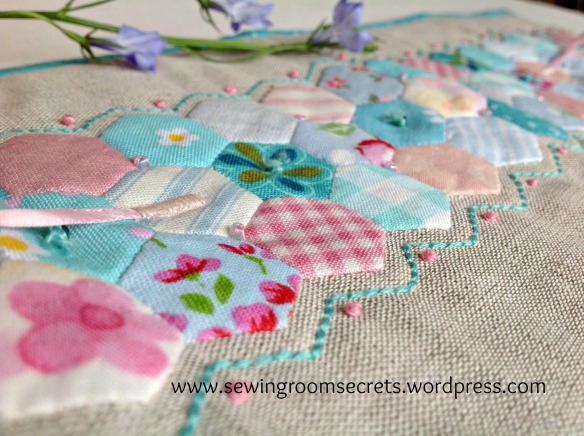
I have just begun to stitch another little version of Harriet & her Teddy, this time I am embroidering the entire thing on to soft white linen (no applique).  I’ve added tiny beads as flower centres and smocking at the top of her dress…

A pocketful of posies


… not sure what it will become this time, just gonna see where the stitches take me …

Natalie x


vintage-style zippered pouch

I have been on a wee bit of a sewing spree just lately. Not a marathon session or anything, more a case of a few stolen moments in my sewing room …

Cosmetic pouch patter npics 198

Anyhow, the result is that I have FINALLY managed to put together a pattern for my little vintage-style zippered pouch, which is now available as an instant download in my Etsy shop.

The pattern for this vintage-style zippered pouch is available in my Etsy pattern shop

I’ve written it in the style of a step-by-step tutorial and have included almost 50 close-up colour photos to help you along, The cool part about it being a digital file is that you can zoom right on in to the photos on your computer if you want to see the details even more closely!

Yo-yo

I have made lots of these little cuties for friends and family now, but this one I will definitely be keeping for my very own 🙂

Inside

Cosmetic pouch patter npics 200.

Suffolk puff embellishment2

Vintage-style zippered pouch1

zip open

And whilst I was in a creative mood, I came across a great tutorial for a fabric notebook cover and enjoyed putting together my own version from the left over fabric scraps.

Notebook5

Add second accent strip Collage

Quote

They make a lovely set … don’t you think?

set3

set2

 Happy stitching everyone!

Natalie x


zakka inspired gift set

With Christmas just around the corner, I have been putting some thought into what little fabric gifts I can make for friends and family this year.

Every year, I make Christmas cookies for the girls at work and last year I made some wee fabric gift bags to put them in

Gift bag template can be found here

Gift bag template can be found here

This Christmas I want to give the girls a little something to go with the usual cookies and I have been wondering what it might be. Every time I think of an idea, I have been jotting it down on a yellow sticky note and pinning it to the notice board in my sewing room.

Sticky notes are great when you need to jot something down real quick; I use them all the time! And I certainly wouldn’t be without them at work (along with the humble highlighter pen!)

sticky notes

Which got me thinkin’! Wouldn’t it be nice to have something pretty to keep them in?

Dangerous thing, thinkin’ … cos now my sewing room is all messed up again!  There are fabric scraps everywhere, I’ve completely forgotten to leave anything out of the freezer for tea, the housework is untouched and I have no idea where the time has gone! But I don’t care … not really

… cos now I have a whole bunch of these wee cuties! 🙂

Pile notes on top

pile aqua on top

Aqua open with pencil

This little sticky note keeper fits two sizes of stickies – 7.5cm square and 9.5cm square

Open showing different sizes of stickies

And the really cool part is that they happen to go great with the little twisted hexagon coasters that I made a couple of weeks ago!

twisted hexagon coaster

I added in a little Sarubobo keyring and Bob’s your Uncle! … a cute little Zakka inspired gift set was born! Don’t you just love it when a plan comes together 🙂

Green set with lily

Green set from above

Green side on

These little Zakka style gift sets will be perfect to accompany the Christmas cookies this year!  I just need to make another half a dozen sets and that’s Christmas 2013 all ‘sewn up’ … (pun intended folks 🙂 )

If you would like to make a sticky note keeper of your own, here’s how:

In the main fabric cut:

  • Four 5” x 1¼” strips (for the borders around the pinwheel centre)
  • Two 4½” x 5½” rectangles (for the back and the inside pocket)
  • One 4½” x 9½” rectangle (for the lining) 

You will also need:

  • Two 3” squares of fabric – one light, one dark – for the pinwheel
  • 5½” x 10½” piece of cotton wadding
  • One 3½” square and one 3¾” square of stiff card

Materials

First make the patchwork pinwheel …

*Use a ¼” seam throughout (unless otherwise stated)

Place the two 3” squares right sides together and sew a continuous ¼” seam all the way around the edge

sew all around the square

Cut the sewn squares in half diagonally.   Then cut again diagonally in the opposite direction

four trianglesPress the patches open towards the darker fabric

Press seams towards the dark fabric

Lay the four patches in the formation of a pinwheel.  It’s easy to mix the patches up and sew the wrong edges together, so I lay the pinwheel out right next to my machine and that keeps me on the right track 🙂

join four squares

Place patches 1 and 2 right sides together and sew together with 1/4″ seam. Join pieces 3 and 4 in the same way. Press the seams towards the dark side.

Join two halves of pinwheel

Now join section A and B with ¼” seam, making sure that  the centre seams are nested together

Press the seam open to reduce bulk

press the centre seam open

Trim the pinwheel – it should measure 3” square

Trim pinwheel

Stitch a 5” border strip to two opposite sides of the pinwheel patch and press the seams out towards the border

first two borders added

Trim the borders flush with the sides of the pinwheel patch

Trim first 2 borders

Stitch the other two border strips to the remaining sides of the pinwheel patch and press seams out towards the border

Pinwheel trimmed

You now have a framed pinwheel block – yay!

Stitch a 4½” x 5½” rectangle to the framed pinwheel block and press the seam away from the block.  Place the piece right side up on the wadding

Lay face up on wadding

Quilt the two layers together by stitching around the pinwheel square and inside the light coloured triangles, about ⅛” from the seam lines.  I did a mixture of hand stitching and machine stitching on mine and I also added a little bead to the centre.

Embellish pinwheel

Trim the wadding flush with the sides of your work

Trim Collage

Take another 4½” x 5½” rectangle and fold it in half, matching up the short sides. Press.  This will form a pocket on the inside.

press pocket

Lay the lining fabric on your work table right side up. Line up the raw edges of the folded pocket piece with the raw edges on one of the short sides of the lining fabric and pin in place

pin pocket to lining fabric

Next, lay the pinwheel panel right side down on top of the pocket panel, matching up all raw edges and pin. (The pinwheel should be at the opposite end to where you have pinned the pocket). Sew all the layers together, leaving the short edge nearest the pinwheel open

Join lining to front panel

Trim away some of the wadding to reduce bulk and clip the corners

Trim wadding

Turn right side out. *Tip – when turning things right side out,  I use a Phillips (star head) screw driver to push out the corners, as I find the little ‘star head’ helps to grip the fabric and is less likely to pierce it than a knitting needle or scissors would. Try it yourself and see what you think!

Insert a 3¾” square of stiff card through the opening and push it to the bottom. It’s a fairly snug fit, so you may have to give it a wiggle. *I used card that was 1/8″ thick for the first couple that I made, but then I used two thicknesses of cereal packet stuck together and that worked just fine.  I used a simple glue stick to stick the card together.

insert first card

Starting from the seam line of the pinwheel block, sew two lines of stitching ¾” apart.  These two lines create a sort of ‘spine’ and encase the cardboard at the same time

encase the first card

Place a 3½” square of stiff card into the opening up to the sewn line

Insert 2nd card

Last bit! Fold in the raw edges of the opening by about ¼” and pin

Close opening

Stitch the opening closed with a line of stitching very close to the edge. Continue to stitch all around the edge of the square very close to the edge, wiggling the cardboard out of the way as you go. I sewed along to the first corner and then, keeping the needle in the down position, I was able to wiggle the cardboard out of the way and pivot my work and sew to next corner and so on.

If you prefer not to sew a line all around the outside, you can just slip stitch the opening closed by hand.

sew close to the edge

finished

That’s it, you’re done!

All you need to do now is insert the back few pages of a sticky note pad into the little pocket and you have a pretty little home for your stickies (oh the simple things that please us eh?) 🙂

Aqua sticky note keep

You don’t have to have a pinwheel as your centre block.  Depending on how you sew your half triangle patches together, you will get a different pattern. For example, I put the patches together as a ‘broken dishes’ block in the centre of this one

red set with keys

… and this one

Pile green facing

Or you could perhaps keep the whole piece plain and embroider a little design on the front – I think some redwork on linen would look fab! A nine patch block would do the trick too – you do whatever takes your fancy.

I’m a wee bit fond of the little red set, so I might have to keep it for myself (maker’s perk an’ all:) )

red set with flower

red set from above

red set with pencil

red set open with pencil

I hope you have enjoyed this little project and feel inspired to make some of your own wee Zakka-style sitcky note keepers – if you do, I’d love to see some pics of your creations! 

Happy stitching and creating everyone

Natalie x

little hexie needle caddy

If you have been following my blog for the last however many weeks you will know that I have been afflicted with a bad case of ‘hexagon-itis’ and my wee pink tin of 1/2” hexies has been my constant companion.  I have really enjoyed re-acquainting myself with the simple pleasures of making hexagons (something I haven’t done since I was a child!) and I can at last reveal the final resting place for all those little six-sided cuties!

Needlebook on fabric pile

My wee pink sewing tin is empty – almost! Just a few lonely little hexies left languishing at the bottom for another day …

pink tin empty2

It has been a very interesting and rewarding mini-hexie-adventure, which began with a neat little pile of the prettiest fabrics …

fabric pile 2

which turned into these …

Hexie tower2

Hexies before joining

which were sewn together like this …

Hexies

which grew into this …

Hexy6

and was appliqued on to linen and embellished with pretty beads and the simplest of embroidery stitches …

Hexies long row with embroidery

and framed all neat and tidy with some dotty aqua binding …

Needlebook binding

to create the perfect home for all my sewing needles 🙂

cover

fully open with needles

Needlebook Open with needles

slope down to the right with needles

When I started making all those wee hexagons I had no idea what I was going to do with them all.  I just liked the cuteness of them and the fact that they require no special tools to construct, just paper, fabric, needle and thread.  No special effort or concentration … a way to just sit, be still and stitch for the love of it.

Needlebook9

Needlebook51

Needlebook47

cover angle flowers

Needlebook10JPG

Needlebook37

It’s been interesting sharing my love affair with hexagons here on my blog and on my facebook page, as it has revealed to me that people are ‘hexagonating’ all over the world! And loving it! It seems we all have a certain fondness for the humble hexagon.

I have written up a pattern for my little needle caddy and it will be listed in my Etsy shop from midnight on Thursday 15th August 2013. I have loved working on this sweet little design and it has been made even more fun by having all of you hexie lovers along for the ride, keeping me company in all my little sewing endeavours, during what has been one of the most glorious British summers for many a long year! Thank you, and happy ‘hexagonating!’!

close up thimble

I am taking a little summer break from blogging and facebooking, but I will be back in September again :). Whilst I may be absent from cyberspace for a few weeks, I will still be ‘around’ stitching and  creating .

Until September then … happy stitching!

Natalie x

mother’s day gifts

I have been wondering what to make with my stack of Suffolk Puffs

Stack of suffolk puffs - sewing room secrets

And, with Mother’s Day just around the corner, I really wanted to use them in a pretty way to make a gift for my Mum.  I had already purchased some delightful novelty pins from Teeny Tiny Vintage (trust me, her pins are even more gorgeous in real life!), but I wanted to give my Mum something else that I had made with my own two hands.

Pins

So ……  I began my usual ritual of ransacking my sewing room, trying to find inspiration from my stash of pretty fabrics, buttons, ribbons, lace and the like.

image

For a while, I drew a blank, but then ‘it’ happened.  You know that moment when you get a picture in your head of ‘it’ – the thing you want to make – and suddenly you become even more frantic in your search for that ‘perfect piece of fabric’.  “I’ll know it when I see it” says the voice in your head and, sure enough, the exact fabric you need turns up… eventually.

image

Amidst the mess that was once my tidy sewing room, I have managed to sew a cute wee zipper pouch and two lavender scented sachets.  All in all, I’m really happy with my efforts. All that’s left for me to do is to package it all up in a pretty ribbon, ready for Mother’s Day (after I’ve put my sewing room back together that is :))

Mother's day gifts from sewing room secrets

Mother's day gifts from sewing room secrets

Mother's day gifts from sewing room secrets

Happy Mother’s Day everyone! x